A dream worth pursuing is transforming your environment into a stunning refuge that benefits the neighborhood’s ecology as well as the attractiveness of its surroundings. And one potent decision—using native plants—holds the key. These amazing floral marvels have developed throughout time to blend seamlessly with Ridgefield, Connecticut’s distinctive surroundings. You may create gorgeous landscapes with less maintenance using native plants while preserving nature’s delicate balance. We’ll unravel the importance of these botanical treasures, unveiling their innate ability to thrive effortlessly in the local environment.
That’s not all, though. We’ll provide the skills and information required to embed these trees skillfully, guaranteeing that your landscaping projects in Ridgefield are a spectacular success. So buckle in and get ready to go on a journey where you’ll learn how to create breathtaking landscapes that you and mother nature will both treasure.
Importance of Native Plants: Shrub/Tree Planting
Native plants are essential for preserving biodiversity and sustaining the regional ecology. They have evolved to flourish in a given area’s particular climate, soil, and animal interactions over time. By incorporating native plants into your landscape, you may improve ecological balance, preserve regional flora and fauna, and foster a more sustainable environment.
Tips for Successful Native Plant Choice
In Ridgefield, Connecticut, native plants are a useful complement to any landscaping endeavor. They have several advantages, such as fewer upkeep requirements, more biodiversity, and enhanced ecological support. When choosing native plants for your landscaping, keep the following in mind:
Research Local Native Species:
Before choosing native plants, familiarize yourself with the native species that thrive in Ridgefield, CT. To learn more about the native plants most suited for your region, speak with local conservation organizations, visit nearby nurseries, or examine gardening manuals. Consider elements like soil type, moisture content, light exposure, and the particular requirements of the plant species.
Assess Your Landscape Conditions:
Examine the soil type, the amount of sunshine available, and the water drainage in your landscape. Some native plants would like particular soil types, while others might need full sun or partial shade. Understanding the conditions of your environment can help you choose native plants that will grow with little maintenance.
Consider Planting Zones:
Ridgefield, CT, falls within USDA hardiness zones 6a to 6b. Verify that the native plants you’ve chosen can thrive in these soil conditions. Plant tags, internet plant databases, or local gardening resources can all provide this information. Plants’ chances of surviving and flourishing will rise if you choose the ones appropriate to your particular environment.
Plan For Diversity:
Incorporate a variety of native plant trees in your landscape design. Various plants encourage biodiversity, draw various pollinators, and beautify the area. Use plants with different heights, blooming periods, colors, and leaves textures to make your garden more interesting and complicated.
Wildlife Benefits:
Native plants provide essential resources for local wildlife, including food, shelter, and nesting sites. When choosing native plants, take into account any potential advantages for animals. Pick plants that produce blooms with lots of nectar for pollinators, shrubs that yield berries for birds, or plants that serve as hosts for butterfly larvae. You may improve the general ecological health of your region by designing a landscape hospitable to animals.
Start Small and Observe:
If you are new to native plant gardening, start with a few species and observe their performance in your landscape. Monitor their development, flowering times, and interactions with neighborhood animals. This lets you gradually learn and modify your plant choice and landscape design.
Seek Expert Advice:
If you are unsure about native plant assortment or need assistance creating a landscape design, consult with local gardening experts, landscape designers, or native plant enthusiasts like teams at A-Z Landscaping. They may offer insightful advice, suggest species appropriate for your objectives, and help you design a successful native plant garden.
Proper Planting Techniques:
Plant Selection: Shrub/Tree Planting
Choosing the right plants for your landscape is essential for their long-term success. Consider the plant’s preferred growth pattern, soil type, moisture content, and sunshine needs. Eastern Redbud (Cercis Canadensis), Sweetbay Magnolia (Magnolia Virginiana), and Black-eyed Susan (Rudbeckia Hirta) are examples of local flora that have adapted to the Ridgefield region.
Planting Hole and Root Ball Preparation:
Digging an appropriate soil cavity is vital for the health of the plant. Don’t dig the hole any deeper than the root ball height, but make sure it’s at least twice as broad. Loosen the dirt at the hole’s bottom and sidewalls to promote root insertion. To reveal the flare of the trunk, gently remove any extra soil from the root base.
Planting Bare Root Trees:
Before propagating bare-root trees:
Give the roots time to soak in water. Spread the remaining roots in the planting trench after trimming any broken or damaged roots. Backfill the hole with dirt, gently compacting it to remove air pockets. After planting, give the soil plenty of water to settle it.
Effective Planting of Container-Grown Trees:
Trees growing in containers should be gently removed from the containers, making sure the roots are secure. To encourage development outward, loosen any tightly circular roots. Before placing the tree in the hole, make sure it is flush with the surrounding soil. To avoid air pockets, carefully compact the dirt as you backfill.
How to Plant a Tree in Clay Soil
Clay soil can be difficult for shrub/tree planting because of its thick texture and poor drainage. Improve drainage before planting a tree in clay soil by enriching it with organic material like compost. Create a deeper hole to promote stronger root development. Avoid overwatering since clay soil holds onto moisture longer.
Best Soil for Planting Trees and Shrubs:
Well-draining, loamy soil is the best kind to use when planting trees and plants. Sand, silt, and clay in a balanced ratio make up loam. While maintaining a suitable level of moisture and nutrients, it offers effective drainage. To increase its texture and fertility, you may add organic matter, such as compost, to sandy or clay-based soil.
Potting Soil for Trees and Shrubs:
Using a high-quality potting mix is essential when planting trees and plants in containers. Find a mix that is specially designed for trees and shrubs, making sure it has sufficient drainage and aeration. Regular garden soil should be used outside pots since it might compress and impede root development.
What is the Depth of the Soil When Planting Trees:
When planting trees, the depth of the soil is crucial for efficient root growth. The soil surface should be level with or just slightly above the root flare, where the trunk spreads at the base. Tree decline can result from planting trees too deeply, which can suffocate the roots. Avoid piling up too much soil at the base of the trunk since this might cause decay and moisture retention.
How to Plant a Tree from Seed:
Growing a tree from seed is gratifying but takes time and careful consideration. Start by gathering seeds from local natural trees. Following the guidelines for each species, clean and ready the seeds for sowing. Place the seeds in a seedbed or containers that have been adequately moistened and exposed to sunshine. When the seedlings have matured enough, transplant them to their final location.
4 Steps of Planting a Tree:
Step 1:> When deciding where to place the tree, please consider its space needs, light exposure, and plant compatibility.
Step 2:> Make sure the root flare is level with or just above the soil surface by digging a planting recess that is wider than the root base and has the right depth.
Step 3: >The tree should be carefully removed from its container, or bare-root trees can be prepared by cutting any damaged roots and spreading the remaining roots out.
Step 4: >Fill the hole with soil and compress it lightly to eliminate any air bubbles. Provide ample watering after planting, then mulch the area surrounding the tree’s trunk to prevent water seepage and weed development.
5 Methods of Planting Trees:
- Bare-Root Planting:> For deciduous trees, bare-root planting is a popular, economical, and ecologically responsible technique. This technique entails planting trees when they are dormant, without leaves or buds. To rehydrate the roots of bare-root trees before planting them, immerse them in water for several hours. Spread the remaining roots in the planting divot after trimming any broken or damaged ones. Backfill the hole until the root flare is flush with the ground. Water heavily to settle the soil after planting.
- Container Planting:> As long as the ground is not frozen, container planting is a practical technique enabling you to enroot trees any time of the year. Trees that have been cultivated in containers are often found in nurseries and garden centers. When planting trees grown in containers, carefully remove the tree from the container while ensuring the roots are secure. To promote outward development, loosen any tightly circular roots. Ensure the tree is leveled with the surrounding dirt before placing it in the hole. To avoid air pockets, carefully compact the dirt as you backfill. After planting, give the tree plenty of water.
- Ball and Burlap Planting: >This method is frequently applied to larger, more established trees. To safeguard the roots during transportation and planting entails excavating a tree with its entire root structure intact. Dig a hole twice as broad as the root ball and as deep as you intend to place a ball and burlap tree. Make sure the tree’s root ball is level with or just above the ground before carefully lowering it into the hole. Backfill the hole with soil, pushing it tightly around the root ball. Remove artificial elements, such as wire baskets or burlap, that can prevent root development.
- Tree Seedling Transplanting: >Transplanting young trees into your environment is an economical way to establish them. Typically, seedlings are grown from seeds in pots or seedbeds or purchased from nurseries. The seedlings can be moved to their permanent place after they are big enough and have formed a strong root system. Create a hole that is deep enough and large enough to accommodate the roots. Ensure the roots are intact when carefully taking the seedling from its container or seedbed. Fill the hole with dirt, insert the seedling, and water the area well to let the soil settle.
- Air Layering:> Air layering is a propagation technique replicating particular cultivars or tree types. On a stem or branch that is still connected to the parent tree, it entails promoting root development. The stem or branch is severed once the roots have formed and then planted as a separate tree. For decorative and fruit trees, air layering is frequently utilized. Without using seeds or grafting, you may clone desirable tree kinds with this technique. Depending on the type of tree, particular air layering procedures may need to be followed to get desired outcomes.
By using these several tree-planting techniques, you may select the one most appropriate for the type of tree, its size, and the particular requirements of your environment. Each approach has benefits and things to keep in mind, enabling you to position trees effectively and add to your surroundings’ aesthetic appeal and environmental worth.
How to Plant a Tree Step-by-Step With Pictures:
The exciting and satisfying task of planting a tree enhances your property’s attractiveness and environmental advantages. To guarantee effective tree implantation, adhere to these detailed directions with images.
Step 1: Choose the Right Tree:> Choose a tree species appropriate for your area’s temperature, soil type, and aesthetic preferences. Think about the tree’s mature size, growth rate, tolerance for shade, and care needs.
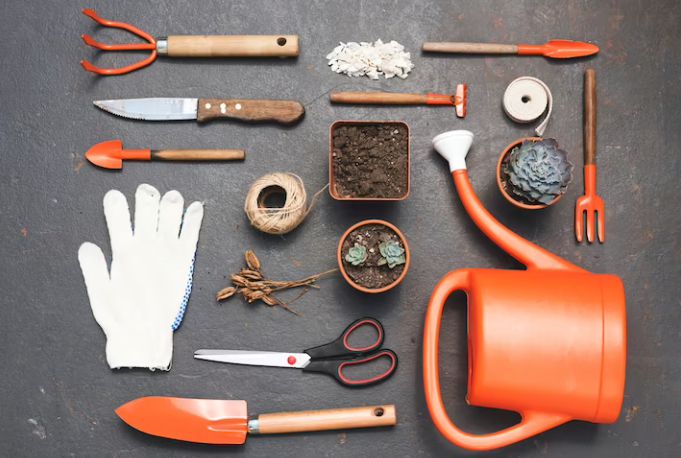
Step 2: Gather the Necessary Tools and Materials:> Collect all of the necessary tools and materials before beginning the planting process. Some of them include things like a shovel, gardening gloves, pruning shears, mulch, compost, and water.
Step 3: Prepare the Planting Hole: >To plant anything, create a shallower hole broader than the root ball or container. While the hole should be no deeper than the root ball’s height, it should be two to three times broader than the root network. This guarantees stable root growth and development.
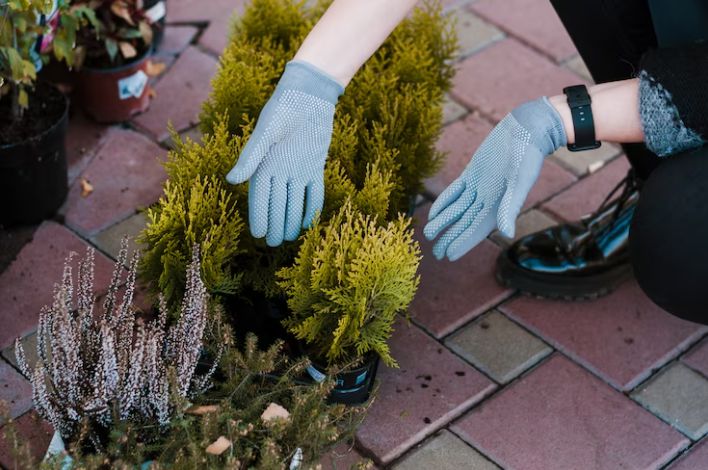
Step 4: Loosen the Roots (for Container-Grown Trees):> If you’re planting a tree grown in a container, take care to remove it gently. To promote development outside the root ball, loosen any tight roots around it.
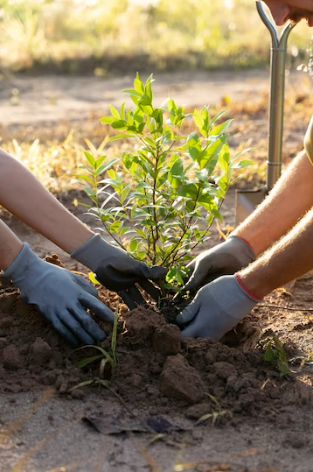
Step 5: Place the Tree in the Hole: >Ensure the root flare, where the trunk spreads at the base, is level with or just above the soil surface before carefully placing the tree in the planting hole. This avoids planting the tree too deeply, which might impede its health and growth.
Step 6: Backfill the Hole:> Begin backfilling the hole with soil, filling in around the roots. To increase soil fertility, combine the excavated dirt with compost. To remove air pockets, gently crush the soil, but don’t compact it too much.
Step 7: Mulch the Base: >Cover the tree’s base with organic mulch, wood chips, or bark. To avoid moisture retention and trunk rot, ensure the mulch is properly distributed and creates a donut-shaped ring, leaving a space around the trunk.
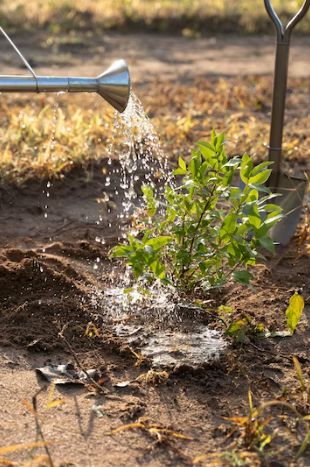
Step 8: Water Thoroughly: >After planting, water the tree thoroughly to settle the soil and provide initial hydration. Water should be streamed slowly and steadily to reach the root zone deeply. Maintain frequent watering, particularly throughout the tree’s establishing stage.
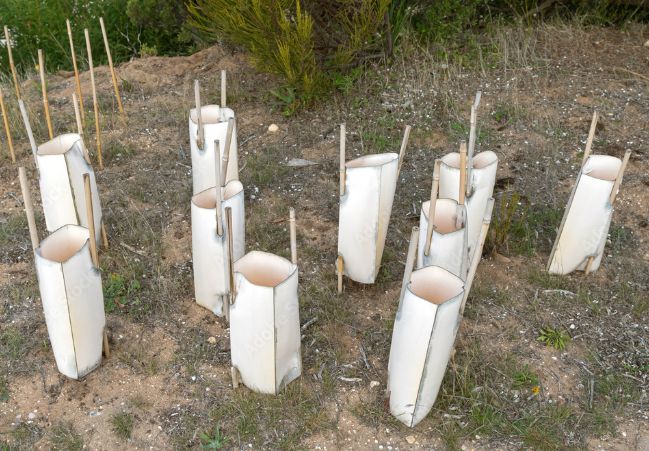
Step 9: Stake if Necessary: >If the tree is top-heavy or exposed to strong winds, you may need to stake it for additional support. Stakes should be placed on the tree’s opposing sides, taking care not to injure the roots. Attach tree ties or straps to provide support while allowing for some flexibility.
Step 10: Maintain and Monitor:> Keep an eye out for symptoms of stress on the tree, such as wilting or yellowing leaves. During dry spells, thoroughly water the tree and add more mulch to help retain moisture. To encourage wholesome development, prune any branches that are broken or crossing.
The Environmental Benefits of Landscaping with Native Plants
Beyond just being beautiful, native plants have several advantages for the environment. You may help protect biodiversity, maintain local animal populations, save water resources, and use fewer pesticides and fertilizers, by adding native species into your environment. Learn about the wonderful environmental benefits of gardening with native species and how you can help Ridgefield, Connecticut, maintain ecological balance.
Conclusion:
In Ridgefield, Connecticut, using native plants in landscaping has several advantages for the environment and property owners. Choosing the correct plants and using the right planting methods may create a sustainable and beautiful landscape. Don’t forget to select native species, properly prepare the planting well, and consider the soil type and moisture requirements. These recommendations can assist you in establishing strong, flourishing trees in your landscape, whether using bare-root trees, trees grown in containers, or trees you’ve started from seed. Enjoy the beauty of native flora while helping to protect Ridgefield’s distinctive environment.